Photo Guide
Get Your Inspiration On
 Use Pinterest to share and easily update your own private inspiration board | Google Drive Google Drive is great for uploading high-quality photos in large quantities | Dropbox Easily create folders and sub-galleries to organize your photos on any device |
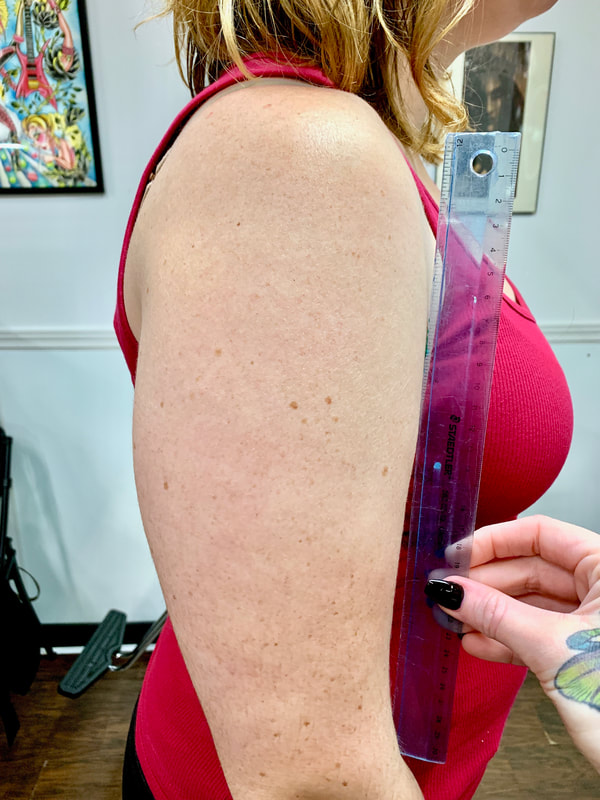
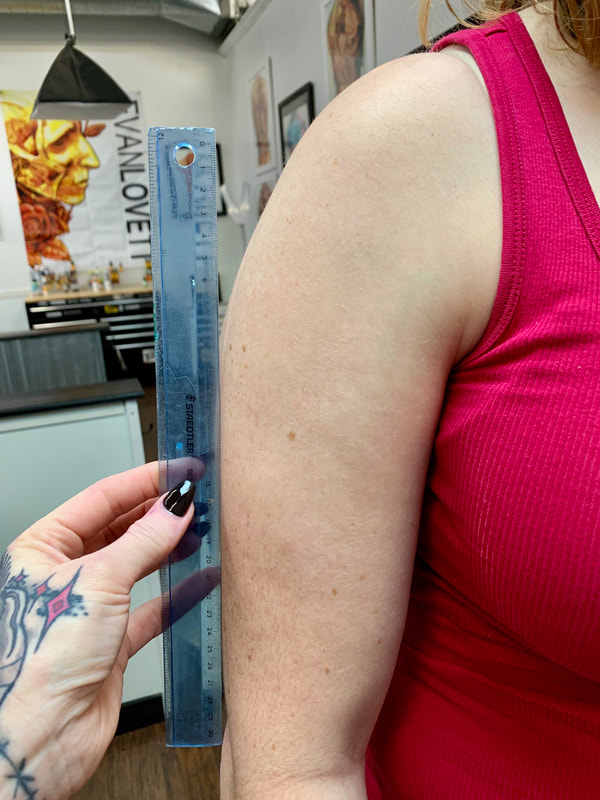
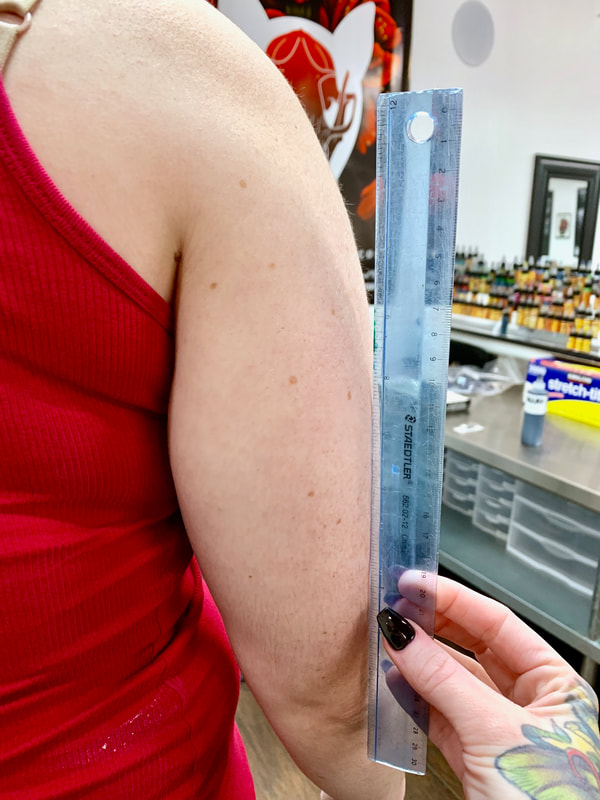
| 1. FIND A BUDDY Selfies and photos in mirrors tend to twist and turn the body area. This can create a warped shape that makes it more difficult to design your tattoo to fit you properly. | 2. GET A RULER Clear, uncolored rulers are helpful but whatever you have around the house will work as long as it's legible. Just be sure to place the ruler close to the desired tattoo area but please be sure not to obstruct or visually block the area. |
| 3. BE BORING Find a plain wall or background and wear neutral clothes so that the camera (and Ruby!) have an easier time focusing on the ruler and the area you are photographing. | 4. CIRCLE IT If you have an idea of the space you want tattooed, feel free to grab a marker (or added digitally afterwards) to highlight the area on the skin so as to help point us in the right direction. |
| 5. LIGHT IT UP Make sure photos are staged in a well lit space. Poor lighting will result in blurry or illegible photos and we will likely ask you to retake them. | 6. LEVEL OUT You don't need an actual level, but you will need to hold your phone or camera and ruler as parallel to the body area as possible so as not to warp or distort the body shape and structure. |
| 7. NOW VOGUE Stay as still as possible and have your friend snap those photos! If you want the tattoo to wrap around the body at all (or if you aren't sure), turn and take photos of multiple angles of the desired body part, and make sure to bring the ruler with you too! | 8. UPLOAD & SHARE Upload your measurement photos and any inspiration you've gathered to the sharing platform of your choice. Create a dedicated folder with your name & concept, then copy the link to your photo gallery and put it in a spot where you'll be able to refer to it easily |
Your privacy
We use optional analytics to improve this site. Change this any time in Your Privacy Choices.
Optional analytics help us understand which pages are useful and where the site needs work. You can opt out or turn them back on at any time.
Checking current setting.
Google ad storage, ad user data, and ad personalization stay disabled. Open the full privacy choices page.